How to activate Bell eSIM in Canada? Whether you are setting up your first eSIM, upgrading from a physical SIM card, or activating a new device, this guide walks you through the Bell eSIM activation process step by step for both iPhone and Android users.
An eSIM (embedded SIM) is a digital version of the physical SIM card, built directly into your device. It lets you activate a Bell mobile plan without needing to insert a SIM card, making it easier to manage your phone service especially if you’re switching phones, adding a second line, or traveling abroad.
Works for: new activations, SIM swaps, dual SIM setups, and Bell upgrades.
Want to compare Bell with other eSIM providers? Check out my complete guide to Canadian eSIM plans.

Why Choose a Bell eSIM in Canada?
Bell is one of the top telecom providers in Canada and supports eSIM for most recent smartphones. Here’s why Bell eSIM might be the right fit for you:
- No need to visit a store to insert a SIM card
- Easily switch between plans or add a second line (great for work/personal split)
- Ideal for dual SIM users who travel or use data-only eSIMs like Airalo or Holafly
Bell eSIM Compatibility: Supported Devices
Wondering how to activate Bell eSIM in Canada on your phone? It starts with making sure your device supports eSIM technology and is unlocked. Most modern devices from Apple, Samsung, Google, and others are compatible. Here’s a quick list of popular supported models:
Apple iPhone Models That Support Bell eSIM:
- iPhone 16, 16 Plus, 16 Pro, 16 Pro Max
- iPhone 15, 15 Plus, 15 Pro, 15 Pro Max
- iPhone 14, 13, 12 series
- iPhone 11, 11 Pro, 11 Pro Max
- iPhone XS, XS Max, XR
- iPhone SE (2nd generation and newer)
Android Phones That Support Bell eSIM:
- Google Pixel 5, 6, 6a, 7, 7a, 8, and newer
- Samsung Galaxy S20, S21, S22, S23, S24 series
- Samsung Galaxy Note 20 and newer
- Samsung Galaxy Z Flip / Fold (all models from 2020 onward)
- Motorola Razr 5G
- Huawei P40, P40 Pro (not all variants)
If you’re unsure whether your device supports eSIM, check your phone manufacturer’s website or contact Bell for confirmation. These devices are all compatible with how to activate Bell eSIM in Canada.

What You’ll Need to Activate Your Bell eSIM
Before you start the setup process, here’s what you’ll need to activate your Bell eSIM in Canada:
- An eSIM-compatible, unlocked smartphone
- A Wi-Fi connection
- Your Bell eSIM QR code (from Bell store, customer support, or MyBell app)
- (Optional) MyBell login details to manage your account or request an eSIM online
How to Get Your Bell eSIM QR Code
To activate your Bell eSIM, you’ll need a QR code. Here’s how to get one:
You can also check the official Bell eSIM support page for the most up-to-date instructions.
1. Visit a Bell Store
The fastest way to switch to eSIM is by visiting a Bell retail location. They can provide you with a printed eSIM QR code and help set it up on the spot.
2. Call Bell Customer Service
Dial 1-866-301-1942 and request a QR code by email. Be ready to confirm your account details.
3. Use the MyBell App (Available to some users)
Some postpaid customers can generate or request their eSIM directly inside the MyBell mobile app or account dashboard.
Step-by-Step: How to Activate Bell eSIM on iPhone
The instructions below explain how to activate Bell eSIM in Canada if you’re using an iPhone with iOS 12.1 or newer. You’ll need your Bell QR code and a Wi-Fi connection to get started. Need help? View Apple’s official eSIM setup guide.
- Buy your Bell eSIM or request your QR code
Visit a Bell store, contact customer service, or use the MyBell app to get your eSIM. - Open your QR code
Open the Bell eSIM QR code on another device or print it out. - Go to Settings on your iPhone
Tap Settings > Cellular > Add eSIM (or Mobile Data > Add eSIM). - Tap Use QR Code
Your iPhone will open the camera to scan the code. - Scan the Bell QR code
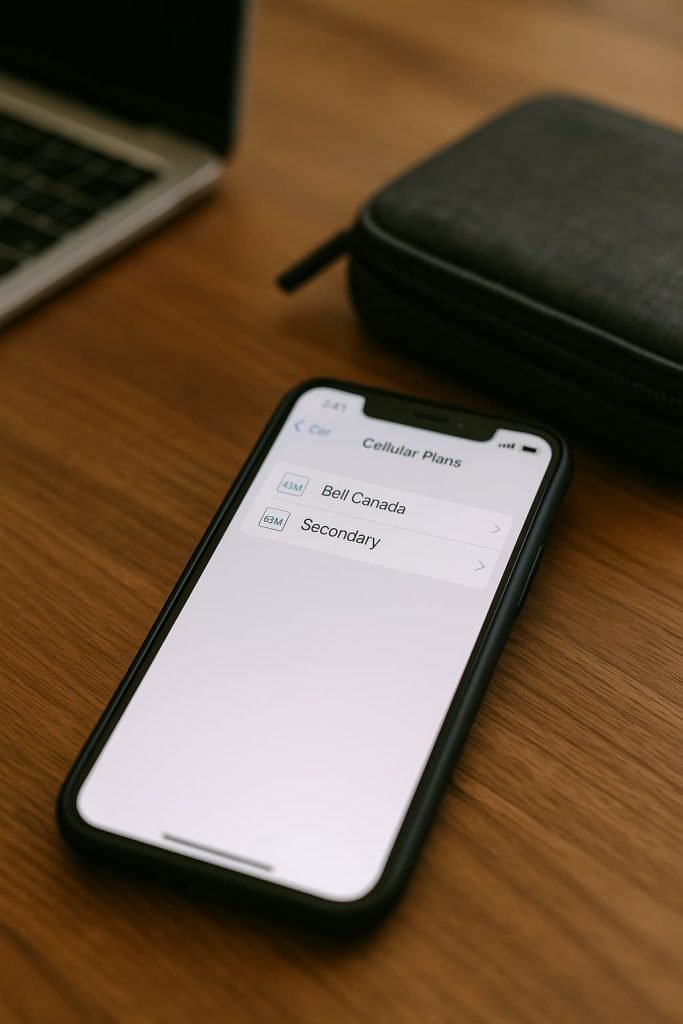
Hold your iPhone steady to scan the code Bell provided. - Label and enable the eSIM
Choose a name like “Bell Canada” and confirm activation. - Enable Data Roaming if needed
Toggle Data Roaming on for the Bell eSIM. - Restart your iPhone (if necessary)
Most iPhones will connect automatically. If not, restart your phone.
Dual SIM tip: You can use Bell as a secondary line while keeping another eSIM or physical SIM active.
Step-by-Step: How to Activate Bell eSIM on Android Phone
- Buy your Bell eSIM or request your QR code
Visit a Bell store, call customer service, or request your QR code through the MyBell app. - Open the QR code on another device or print it out
You’ll need it ready to scan with your phone. - Go to Settings on your Android device
Tap Network & Internet > SIMs (or Connections > SIM Manager). - Tap “Add eSIM” or “Download SIM Instead”
Choose the QR code option when prompted. - Scan your Bell QR code
Hold your phone over the printed or onscreen code to begin installation. - Label and activate the plan
Name your plan (e.g. “Bell Canada”) and confirm setup. - Restart your phone (if needed)
Your eSIM should now connect to Bell’s mobile network. If not, try restarting or toggling airplane mode.
Some older Android phone devices may require a software update to enable eSIM support. If you’re using a Google Pixel, check the official Pixel eSIM setup guide. For other brands like Samsung or Huawei, check your manufacturer’s support page. You can also view Samsung’s official eSIM guide or Huawei’s support portal.

Switching from a Physical SIM to Bell eSIM?
Already using a Bell physical SIM and want to switch to eSIM? Here’s how:
- Back up your phone
- Contact Bell (store or phone) and request an eSIM SIM swap
- They’ll deactivate your physical SIM and issue a new eSIM QR
- Follow the activation steps above for your device
Once activated, your number, plan, and data all transfer seamlessly to the eSIM.
Bell eSIM Troubleshooting Tips
Running into issues while figuring out how to activate Bell eSIM in Canada? Here’s how to fix the most common problems you might encounter:
Issue: I didn’t receive a QR code
- Solution: If you signed up in-store, they should have printed one. If not, check your email or Bell account. Still nothing? Call 1-866-301-1942 or visit a Bell store to request a new eSIM QR code.
Issue: The QR code won’t scan
- Solution: Increase your screen brightness and hold the phone steady. If that fails, print the QR code and try again. Make sure your camera lens is clean.
Issue: My phone shows no signal after activation
- Solution: Restart your phone or toggle Airplane Mode on and off. Make sure the Bell eSIM is enabled under Mobile Network settings and set as your active data line.
Issue: I see a “profile already used” or “invalid eSIM” error
- Solution: This means the QR code was already installed on a different phone. You’ll need to contact Bell and request a fresh QR code.
Issue: iPhone says “Unable to Activate”
- Solution: Connect to Wi-Fi, then try scanning the QR code again. If it still fails, reset your Network Settings:
Settings > General > Transfer or Reset iPhone > Reset Network Settings
Still stuck? Bell’s dedicated eSIM support line is 1-866-301-1942. Don’t hesitate to call for help.

Pros and Cons of Using Bell eSIM in Canada
Pros:
- Access to Canada’s largest mobile network (Bell)
- Compatible with most modern smartphones
- Easy to activate via QR code
- Supports dual SIM mode for travelers and business users
- Works well with international eSIMs like Holafly and Airalo
Cons:
- eSIM support currently limited to postpaid plans (no prepaid eSIMs yet)
- Not all features available in MyBell app for eSIM users
- Requires a store visit or phone call to get the QR code (not fully self-serve)
Can I Use a Bell eSIM with a Travel eSIM?
Yes! Bell supports dual SIM functionality, so you can:
- Keep your Bell number active for calls and texts
- Use a travel eSIM (like Airalo or Holafly) for international data at lower cost
- Toggle lines or set one as default for mobile data
Learn more: Best Travel eSIM Plans for Canada
How Long Does Bell eSIM Activation Take?
In most cases, Bell eSIM activation is quick and seamless:
- In-store activation: usually takes 5–10 minutes if done with staff help
- Online or email QR code activation: about 3–5 minutes once you scan the code
- Switching from physical SIM to eSIM: allow up to 10–15 minutes, especially if you’re doing a SIM swap through customer service
Once your eSIM is installed, your phone should connect to Bell’s network within a few minutes. If it doesn’t, a quick restart or toggling airplane mode often solves the issue.
Pro Tips for Bell eSIM Users in Canada
- Keep a backup of your QR code in case you switch phones
- You can reinstall the eSIM after a factory reset (as long as you don’t delete it first)
- Your Bell eSIM will not work on locked phones, so make sure yours is unlocked
- Dual SIM mode works best if both eSIM and physical SIM are from compatible carriers
Related Guides
Looking for more Canadian eSIM setup guides or provider comparisons? Start here:
- eSIM Canada: Best Providers, Setup & Guide for Travelers & Locals
- Compare Canadian eSIM Providers
- Best Canadian eSIM Plans for Tourists (2025)
- How to Activate an eSIM on Android in Canada
- How to Activate an eSIM on iPhone in Canada
- How to Activate Airalo eSIM in Canada
FAQ: How to Activate Bell eSIM in Canada
Can I get a Bell eSIM online?
Yes, in some cases. If you’re wondering how to activate Bell eSIM in Canada without visiting a store, some postpaid users can request an eSIM through the MyBell app or by contacting support. For new activations or device changes, visiting a Bell store is still the most reliable method.
Does Bell support eSIM for prepaid users?
Not currently. eSIM is mostly available to postpaid (monthly plan) users.
Can I move my Bell eSIM to a new phone?
Yes, but you’ll need a new QR code from Bell. eSIMs are device-specific and can’t be reused once deleted.
How much does a Bell eSIM cost?
Bell doesn’t charge for switching to eSIM, but standard activation or plan fees may apply.
Final Thoughts on Activating Your Bell eSIM in Canada
Making the switch to a Bell eSIM is one of the easiest ways to streamline your mobile setup in Canada especially if you want to travel light, use dual SIMs, or stop messing around with physical SIM cards. It only takes a few taps and a QR code, and you’re good to go.
If you’re thinking of trying another provider or setting up a second line, I’ve got you covered. Check out my step-by-step activation guides, or see how Bell stacks up in my comparison of the best Canadian eSIM providers.