A travel eSIM not working abroad can be especially frustrating when everything looked fine before the trip. You installed the plan in Canada, landed at your destination, turned the line on and expected it to connect. Instead, the phone may show No Service, SOS, Searching, no mobile data, or your Canadian SIM may still be handling the connection.
The first thing to determine is what kind of failure you actually have. No Service or Searching is not the same problem as having normal signal, LTE, 4G or 5G but no internet. The first usually points toward network registration. The second means the travel eSIM may already be connected to a mobile network, but the data connection is failing further down the chain.
Start with the post-arrival checks below before changing APN settings, resetting network settings or deleting the eSIM.
Quick Diagnosis: No Service or No Internet?
Make sure the travel eSIM line is turned on and selected for mobile data. Check whether your provider requires data roaming on the travel line, confirm that your destination is included in the plan, and verify that the plan is active. If the phone still shows No Service or Searching, refresh the connection and check which local networks your provider supports before trying manual network selection. If the phone already shows signal or 4G/5G but has no internet, use the dedicated eSIM Connected but No Internet troubleshooting path instead.
Travel eSIM Not Working After Landing? Start With These Checks
Work through the simple checks first. Most of them are reversible and tell you something useful about where the problem is occurring.
- Confirm that the travel eSIM line is turned on.
- Make sure the travel eSIM is selected for mobile data.
- Check the provider’s instructions for data roaming on that travel line.
- Verify that your current country is covered by the plan.
- Check that the plan has started, has not expired and still has usable data.
- Toggle Airplane Mode briefly, then reconnect.
- Restart the phone if it still will not register.
- Leave network selection on Automatic initially.
- If registration still fails, check which partner networks the eSIM supports before selecting one manually.
Do not delete the eSIM simply because it has not connected immediately. Deleting a profile can turn a connection problem into an installation or replacement problem, especially if the provider does not allow the original activation details to be reused.
Does the Travel eSIM Show No Service or Have Signal but No Internet?
This distinction saves a lot of unnecessary troubleshooting.
No Service, SOS or Searching
If the travel eSIM shows No Service, SOS or Searching, the phone has not successfully registered that line on a usable network.
The eSIM profile can still be installed correctly. What is missing is the next stage: registration with a network that the plan is allowed to use in that destination.
Likely checks include:
- travel eSIM line turned off
- wrong country or regional plan
- plan not yet active
- destination not supported
- roaming disabled when the provider requires it
- phone still trying an unsupported network
- supported partner network unavailable
- network registration or provider-side provisioning problem
- device lock or compatibility issue
The goal at this stage is to get the line registered. APN changes are generally not the first thing I would reach for when the phone cannot connect to a network at all.
Signal, LTE, 4G or 5G but No Data
A phone showing signal bars or LTE, 4G or 5G has moved further through the connection process. It may already be registered on a network, but mobile data is not passing correctly.
That can involve the selected data line, roaming requirements, remaining data, APN configuration or the provider’s data session.
That is a separate troubleshooting path. Use my eSIM Connected but No Internet guide for the deeper mobile-data checks rather than repeating them here.
Make Sure the Travel eSIM Is Turned On and Selected for Mobile Data
A Dual SIM phone can have both your Canadian line and travel eSIM enabled while using only one of them for mobile data.
That distinction matters.
Keeping Bell, Rogers, TELUS or Freedom active does not automatically mean the Canadian line needs to carry your internet traffic. You can often leave the home line available for your number while choosing the travel eSIM as the mobile-data line.
On an iPhone, Apple allows you to turn individual lines on or off under Settings > Cellular, and choose the line used for cellular data under Cellular Data.
If the Canadian SIM is still selected for cellular data, the travel eSIM can be installed and enabled without actually carrying your browsing, maps or app traffic.
Also check any setting that allows automatic cellular-data switching between lines. That feature can be useful in some situations, but it may be undesirable when the whole point of the travel eSIM is to keep mobile data away from your Canadian roaming line.
Check Data Roaming on the Travel eSIM
The word roaming causes understandable confusion here.
Many travel eSIMs do not operate as native subscriptions on the network you see on your screen. They connect through roaming agreements with one or more local partner networks. In those cases, data roaming may need to be enabled on the travel eSIM line.
That does not mean every travel eSIM universally requires roaming. Follow the instructions for the provider and plan you actually purchased.
More importantly, do not treat the two SIMs as though they share one roaming setting.
For a typical Canadian Dual SIM setup:
- the travel eSIM may need data roaming enabled if its provider requires it
- the Canadian home line may need data roaming disabled if you do not want that line carrying roaming data
Do not assume that turning off data roaming on your Canadian line prevents every possible roaming charge. Calls, sent texts, voicemail behaviour and carrier-specific roaming triggers can be handled separately from mobile data.
Confirm the Destination, Plan Status and Activation Timing
Before troubleshooting the phone further, check the plan itself.
A travel eSIM can be installed correctly and still fail to connect because the service conditions have not been met.
Verify:
- Destination coverage: Is the country you are currently in included?
- Plan type: Did you buy a country plan or a regional plan?
- Activation status: Does the provider show the plan as active?
- Validity: Has the plan expired?
- Remaining data: Is there usable data left?
- Activation rule: Does the provider start validity at purchase, installation, activation or first network connection?
Activation timing varies by provider and plan. There is no useful universal rule such as “wait five minutes” that applies to every travel eSIM.
This also matters on multi-country trips. A regional eSIM that worked in France, for example, does not prove that it includes Switzerland, Turkey or another country you visit next. Check the actual destination list rather than assuming the regional label covers every neighbouring market.
Refresh the Connection Before Changing Advanced Settings
Once the basic settings look correct, give the phone another clean opportunity to register.
Start with Airplane Mode. Turn it on briefly, then turn it off and allow the phone to search again.
If that changes nothing, restart the phone.
You can also turn the travel eSIM line off and back on through the SIM or cellular settings without deleting the profile.
These are better early steps than immediately changing APNs, resetting all network settings or removing the eSIM.
Mobile registration can fail temporarily after a flight, border crossing or network transition. A clean reconnect is often enough to tell the phone to repeat its network search.
Check Automatic and Manual Network Selection
Automatic network selection should usually be the starting point.
Your phone scans available networks and tries to register with one supported by the travel eSIM.
Problems can arise when:
- automatic selection lands on a network the plan cannot use
- several partner networks are supported but one is temporarily unavailable
- your phone keeps trying a previously selected operator
- you have entered a new country during a multi-country trip
If automatic selection repeatedly fails, manual network selection can be useful as a diagnostic step.
The important part is not to pick whichever network has the strongest name or signal on your screen. A travel eSIM can only use networks permitted by its provider and plan.
Find the Networks Supported by Your eSIM
Check the provider’s current destination page, app, installation instructions or support documentation.
Look for the network or networks listed for the country you are visiting.
If the provider names two supported operators, either may be worth trying. If it identifies only one partner, repeatedly choosing unrelated networks is unlikely to solve the problem.
Some travel eSIM providers also change network arrangements over time. Use current provider information rather than a network name remembered from an older trip or review.
When Manual Network Selection Makes Sense
Manual selection is most useful when:
- the phone remains on Searching
- automatic selection repeatedly fails
- the provider explicitly recommends a particular network
- several networks appear but the phone does not register automatically
- you have moved into a new country covered by a regional plan
After testing a supported network manually, give the phone a reasonable opportunity to register.
If none of the provider-supported networks will accept the line, that becomes useful information for provider support.
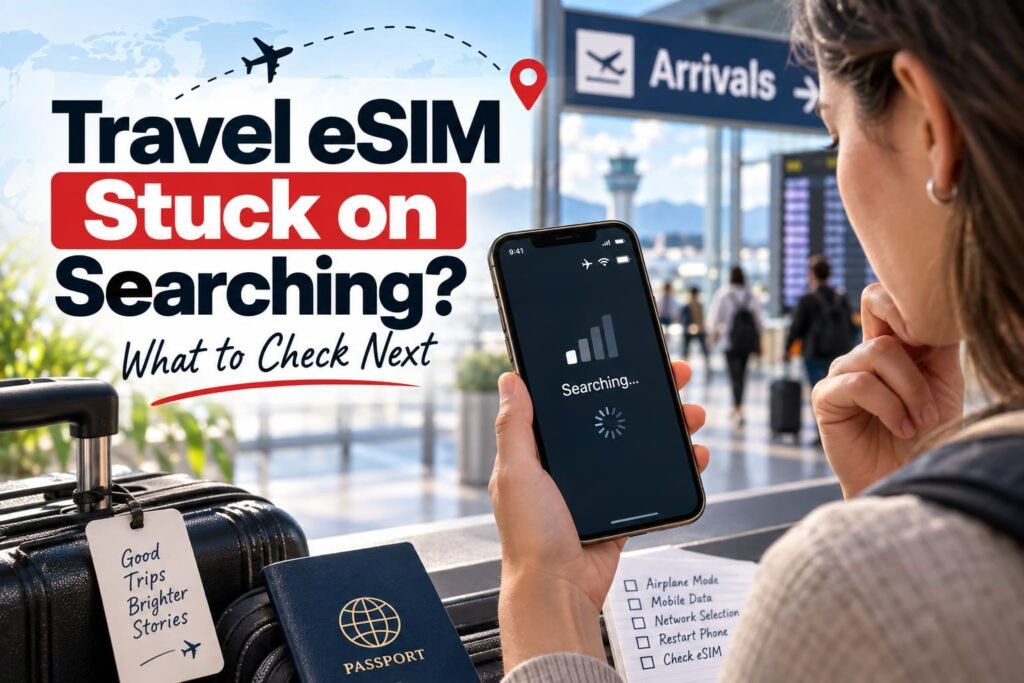
What to Do If the Travel eSIM Is Stuck on Searching
A persistent Searching message keeps the problem in the network-registration stage.
At this point, confirm:
- eSIM line is enabled
- destination is supported
- your plan appears active
- roaming is configured according to the provider’s instructions
- automatic network selection has been retried
- any manually selected network is one the provider actually supports
- the phone is not carrier-locked in a way that prevents the travel eSIM from being used
Move to an area where mobile coverage is more likely if you have just landed underground, inside a terminal, in a remote area or somewhere with poor signal.
If another SIM in the same phone can see local service but the travel eSIM cannot register with any of its supported networks, provider-side help becomes increasingly appropriate.
What If You Have Signal but Still Have No Internet?
Once the phone shows normal bars, LTE, 4G or 5G, stop treating it like a pure No Service problem.
First confirm that the travel eSIM is the selected mobile-data line and that its plan still has usable data.
If those basics are correct, continue with eSIM Connected but No Internet, which covers the deeper data-routing checks, including roaming requirements, plan status, network selection and APN configuration.
That separation matters because repeatedly trying to reinstall an eSIM that already has network signal can send you in the wrong direction.
iPhone, Samsung Galaxy and Google Pixel Travel eSIM Settings
The names of the controls vary slightly between phones, but the troubleshooting logic is similar.
iPhone
Go to Settings > Cellular.
Check that:
- the travel line appears under your SIMs
- Turn On This Line is enabled
- the travel eSIM is selected under Cellular Data
- Data Roaming matches the travel provider’s instructions
- Cellular Data Switching is set the way you intend for your Dual SIM setup
Apple explains these controls in its Dual SIM guidance for iPhone.
If the travel eSIM does not appear at all, that is no longer simply an after-landing network-registration problem. The installation or activation path needs to be checked instead.
Samsung Galaxy
Samsung menu wording can differ by Galaxy model, One UI version and carrier, but the main controls are generally under Settings > Connections.
Use SIM manager to confirm that the eSIM is enabled and assigned appropriately, then use Mobile networks for settings such as roaming and network operators where available. Samsung’s Galaxy eSIM and SIM manager guidance covers the current SIM-management path.
Avoid changing APN values just because they are visible. Use the provider’s supplied APN information if the issue has progressed into a signal-with-no-data problem.
Google Pixel
On current Pixel guidance, mobile network controls are managed per SIM.
Google exposes settings for:
- mobile data
- roaming
- preferred network type
- network operator
- access point names
If more than one SIM is installed, make sure you are editing the travel eSIM rather than your Canadian line. Google’s Pixel mobile-network guidance covers these network and SIM controls.
The exact menu layout can change with Android releases, so follow the labels on your device rather than forcing an older menu path that no longer matches.
Using a Travel eSIM With Bell, Rogers, TELUS or Freedom
Keeping your Canadian number active while a travel eSIM handles data can be useful for authentication texts, important calls and messages.
The overall Dual SIM strategy is straightforward:
- keep the Canadian line active when you need access to the number
- use the travel eSIM for mobile data
- configure roaming separately on the home and travel lines
- understand what activity your Canadian carrier treats as roaming usage
- avoid using the Canadian line for mobile data unless that is intentional
For a broader explanation of this setup, see Travel eSIM vs International Roaming for Canadians.
The billing details are carrier-specific.
Rogers says incoming text messages and unanswered calls do not generate roaming charges in the situation described in its roaming FAQ. Sending a text, making or answering a call, or using cellular data can count as roaming activity.
TELUS says incoming texts do not activate Easy Roam. Its Easy Roam guidance explains that cellular data, sending a text, making or answering a call, or checking voicemail can activate roaming usage.
Bell says Roam Better can be triggered when you make or answer a call, send a text, use Apple Live Voicemail, or send or receive mobile data. Bell’s Roam Better FAQ also warns that background data can count.
Freedom’s roaming treatment depends on the plan or roaming option attached to the line, so check the current terms for your specific plan in Freedom Mobile’s roaming guidance before assuming that leaving the line active has no billing implications.
The safe rule is not “leave the Canadian SIM on and nothing will happen.” Keep it active only if you understand what your specific plan treats as roaming usage.
How Do I Stop the Canadian Line From Taking Over Mobile Data?
Set the travel eSIM as the default mobile-data line.
Then review any automatic data-switching or fallback setting that allows the phone to move data to another SIM when the selected line is unavailable.
On iPhone, Apple calls this Allow Cellular Data Switching. If your goal is to keep mobile data on the travel eSIM, review that setting so the Canadian line does not unexpectedly become the data connection.
Android manufacturers use different labels, but equivalent controls are generally found in SIM manager or mobile-network settings.
Before You Delete the Travel eSIM
A travel eSIM showing No Service, Searching or no data does not automatically need to be removed. First check the line, data selection, roaming requirement, destination, plan status and supported network. Some activation codes are single-use or require provider assistance before the profile can be reinstalled. Delete the eSIM only when the provider’s instructions or the specific troubleshooting path gives you a reason to do so.
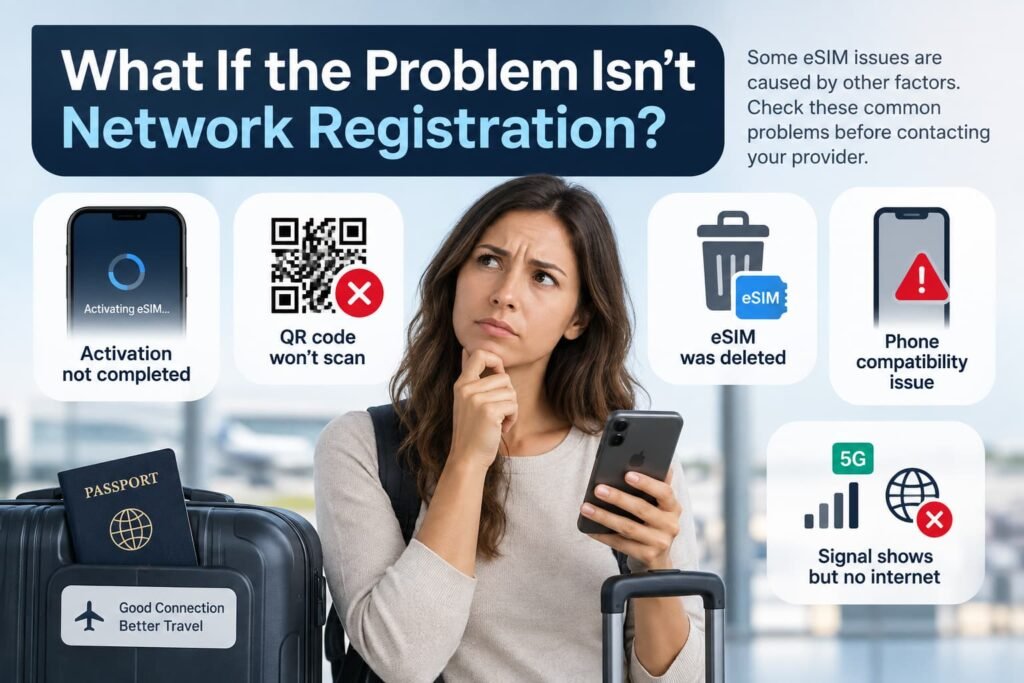
What If the Problem Isn’t Network Registration?
Not every travel eSIM problem after landing is caused by a failure to register on the local network. Sometimes the issue started earlier during activation or installation. In other cases, the eSIM has already connected to a network and the remaining problem is mobile data.
The symptoms below help separate those situations from a true No Service or Searching problem.
Activation never completed properly
An eSIM that never finished activating is different from one that activated successfully but cannot register after arrival.
Look at the eSIM status on the phone and in the provider’s app or account. If the profile remains stuck on Activating, shows an activation error, or the provider still shows the line as pending, the problem may be with provisioning rather than the local network.
Repeatedly changing network operators will not usually solve an activation that never completed. Use What to Do If eSIM Activation Fails in Canada for the activation and provisioning checks.
QR code will not scan or is rejected
A QR code problem normally happens before the travel eSIM is fully installed.
If the phone cannot read the QR code, reports that the code is invalid or expired, or says the activation details have already been used, stop treating it as a network-registration problem. The phone may not have a usable eSIM profile to connect with yet.
Do not keep rescanning the same code indefinitely. Some activation codes are single-use, while others may need to be reset or replaced by the provider.
Use eSIM QR Code Won’t Scan for QR, activation-code and manual-installation troubleshooting.
eSIM was deleted
Deleting the profile changes the problem completely.
Once the eSIM is no longer listed on the phone, network selection, roaming and Airplane Mode will not bring it back. The immediate question becomes whether the provider allows the same eSIM to be downloaded again or requires a new activation code.
Avoid repeatedly scanning the original QR code unless the provider confirms that it can be reused. Reinstallation rules vary considerably between providers.
Use How to Reinstall or Reactivate an eSIM in Canada for the recovery and reinstallation path.
Phone compatibility may be the issue
A phone can support eSIM technology and still have a compatibility problem with the travel plan being used.
Regional device variants, carrier locks, firmware differences and network-band support can all affect whether an eSIM installs or connects normally. A phone purchased through a Canadian carrier may also need to be checked for SIM restrictions if a newly installed travel eSIM consistently fails while other lines work.
Compatibility becomes more suspicious when the travel eSIM never registers despite confirmed destination coverage, an active plan and supported networks being available.
Use the eSIM Compatibility Checker if there is still uncertainty about the phone, regional model or eSIM support.
Signal is showing but internet still does not work
LTE, 4G or 5G changes the diagnosis.
Those indicators generally mean the travel eSIM has progressed beyond the No Service or Searching stage and is registering on a mobile network. Continuing to troubleshoot it as a network-registration failure can send you in the wrong direction.
First confirm that the travel eSIM is still selected for mobile data and that the plan has usable data remaining. Beyond that point, the problem may involve roaming requirements, the data session, APN configuration or another mobile-data setting.
Use eSIM Connected but No Internet for the deeper data troubleshooting.
If none of these situations match what the phone is showing, the broader eSIM Troubleshooting guide can help narrow down the failure type.
When to Contact the Travel eSIM Provider
Contact the provider when the phone and plan appear correctly configured but the travel eSIM still cannot register on a supported network.
Provider support is the next step when:
- destination coverage is confirmed
- your plan appears active
- the travel eSIM is enabled
- roaming matches the provider’s instructions
- a supported network is visible but rejects registration
- none of the listed partner networks will connect
- service never starts after arrival
- you need the provider to confirm provisioning or the correct partner network
Give support useful details from the start:
- phone make and model
- current country
- eSIM plan name
- No Service, SOS or Searching status
- supported local networks that appear on the phone
- whether automatic and manual network selection have already been tried
- current plan status
- roaming setting on the travel line
A screenshot of the SIM or network settings screen can also help if the provider accepts images.
Frequently Asked Questions About Travel eSIM Not Working Abroad
Why does my travel eSIM show No Service or Searching after landing?
No Service or Searching usually means the travel line has not registered successfully on a usable mobile network.
Confirm that the eSIM line is enabled, the destination is included in the plan and the provider considers the plan active. Check whether the provider requires roaming on the travel eSIM.
Leave network selection on Automatic initially. If the phone continues searching, check which local partner networks the provider supports and try one of those manually if necessary.
If the phone later shows normal signal or 4G/5G but the internet still does not work, the problem has shifted from network registration to mobile-data troubleshooting.
Do I need to turn on data roaming for my travel eSIM to work?
Many travel eSIMs require data roaming because they connect through roaming agreements with local partner networks.
That is not a universal rule, so follow the instructions for the specific plan you purchased.
Be careful to distinguish roaming on the travel eSIM from roaming on the Canadian home line. Each line can have different requirements.
How do I make sure my phone is using the eSIM for data instead of my Canadian plan?
Set the travel eSIM as the phone’s mobile-data or cellular-data line.
On iPhone, this is controlled under Settings > Cellular > Cellular Data. Samsung and Pixel phones provide similar SIM-management controls, although the wording can differ.
Also review automatic data switching so the phone does not fall back to the Canadian line when that is not what you want.
What should I do if my travel eSIM connects to the wrong local network?
Check which networks your provider says the eSIM supports in that destination.
Automatic network selection should normally be tried first. If it repeatedly fails, switch to manual selection and choose one of the provider-supported partners.
The strongest visible network is not automatically the correct roaming partner for your eSIM.
How long should I wait for a travel eSIM to connect after I arrive?
There is no universal connection time that applies to every travel eSIM, provider and destination.
Give the phone an opportunity to complete its initial network search, but if it remains on
Searching or No Service, begin checking the line status, roaming requirement, plan activation and supported networks rather than waiting indefinitely.
A brief Airplane Mode cycle or restart can also force a fresh network search.
Should I turn off my Rogers, Bell, TELUS or Freedom line while travelling?
Not necessarily.
Keeping the Canadian line active can be useful for incoming texts, authentication or access to your Canadian number while the travel eSIM handles mobile data.
The important part is understanding the roaming triggers for your carrier. Rogers says incoming texts and unanswered calls do not generate roaming charges in the situation covered by its roaming FAQ. TELUS says incoming texts do not activate Easy Roam. Bell lists calls you make or answer, sent texts, Apple Live Voicemail and mobile data among its
Roam Better triggers. Freedom treatment depends on the plan or roaming option attached to the line.
If you do not need your Canadian number during the trip, turning the line off removes much of that uncertainty.
How do I stop my phone from switching mobile data back to my Canadian carrier?
Select the travel eSIM as the default mobile-data line.
Then review the phone’s automatic data-switching or fallback setting. On iPhone, this is Allow Cellular Data Switching. Android phones may use different labels in their SIM-management settings.
If the goal is to keep mobile data entirely on the travel eSIM, do not allow the Canadian line to become the fallback data connection.
Can I keep receiving Canadian SMS or 2FA codes while using a travel eSIM?
Often, yes, if the Canadian line remains active and can register on a roaming network.
Rogers says incoming texts do not generate roaming charges in the situation described in its roaming FAQ, while TELUS says incoming texts do not activate Easy Roam. Bell does not list receiving a standard SMS among the Roam Better triggers cited above. Freedom behaviour depends on the plan and roaming setup.
Delivery is a separate issue from billing. Some verification services use short codes or other systems that may not work normally while roaming, so it is smart to set up another authentication method before travelling when an account allows it.
How can I avoid using my Canadian carrier’s roaming data while a travel eSIM is active?
Choose the travel eSIM as the mobile-data line and prevent the phone from automatically switching data back to the Canadian SIM.
Disabling data roaming on the Canadian line adds another safeguard against cellular roaming data, but it does not guarantee that calls, sent texts or other carrier-defined roaming activity cannot create charges.
If you do not need the Canadian number at all, turning that line off is the simplest setup. If you need it for SMS or authentication, Dual SIM gives you more flexibility but requires a little more attention to the data-line and roaming settings.
Related eSIM Guides
If the travel eSIM still is not working, the next guide depends on where the connection is failing.
Fix Another eSIM Problem
- eSIM Connected but No Internet if the phone has LTE, 4G or 5G but mobile data still does not work.
- What to Do If eSIM Activation Fails in Canada if the profile never activated properly or remains stuck during activation.
- eSIM QR Code Won’t Scan if the QR code cannot be read, is rejected, expired or has already been used.
- How to Reinstall or Reactivate an eSIM in Canada if the eSIM was deleted or the provider has confirmed that reinstallation is required.
- eSIM Troubleshooting for problems that do not clearly fit activation, network registration or mobile-data troubleshooting.
Check the Phone Setup
- eSIM Compatibility Checker if there is still uncertainty about phone support, regional models or eSIM compatibility.
- How to Activate eSIM on iPhone in Canada for iPhone eSIM setup and Dual SIM controls.
- How to Activate eSIM on Samsung Galaxy in Canada for Galaxy SIM manager and eSIM setup.
- How to Activate eSIM on Google Pixel in Canada for Pixel eSIM and SIM settings.
Before Your Next Trip
- Travel eSIM vs International Roaming for Canadians for deciding how to use a Canadian line alongside a travel eSIM abroad.
Final Thoughts: If Your Travel eSIM Still Won’t Connect
When a travel eSIM fails after landing, I would resist the urge to start changing every setting on the phone. The quickest route is usually to identify what the phone is actually telling you first.
No Service or Searching points toward registration with the local network. Start with the travel line, destination coverage, plan status, roaming requirement and supported partner network. If LTE, 4G or 5G is already showing, the eSIM has made it further and the problem is more likely on the mobile-data side.
I would also leave the eSIM installed while working through those checks. Deleting a profile rarely fixes a network-registration problem and can make things more complicated if the activation code cannot simply be reused.
If everything on the phone looks right but the eSIM still will not register, that is the point where I would contact the provider. They can confirm whether the plan is properly provisioned and which partner network should be accepting the connection. If normal signal is already showing but there is still no internet, the problem has moved beyond network registration and into mobile-data troubleshooting.