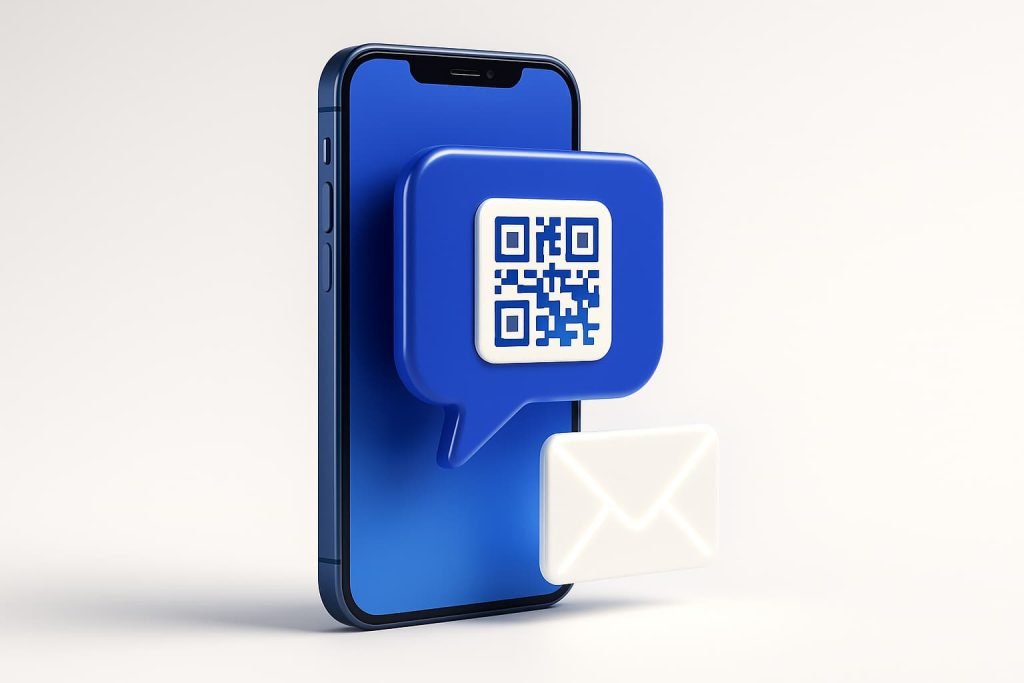
If you are trying to figure out how to activate Eastlink eSIM in Canada, you are not alone. Eastlink does support eSIM, but they do not make the process as obvious or as self-serve as some of the bigger carriers. The rules are different depending on whether you bought your phone from Eastlink or you are bringing your own device, and iPhone and Android users are handled differently as well.
In this guide, I am going to walk you through everything you need to know to get your Eastlink eSIM activated in Canada without going in circles. We will cover how Eastlink actually provisions eSIM profiles, how to request or receive your QR code, how to activate on iPhone and Android devices, what happens if you delete your eSIM or change phones, and what to try when things do not work on the first attempt.
Use this as your reference when you set up your Eastlink eSIM for the first time, switch from a physical SIM, or move your number to a new device.

Why Switch to Eastlink eSIM in Canada?
If your current Eastlink physical SIM is working, it might feel easier to leave things as they are. However, switching to an Eastlink eSIM offers clear benefits:
- You are upgrading to a newer phone without a SIM tray, or a phone that uses eSIM as the primary option.
- You want a cleaner setup without dealing with small plastic SIM cards that can be lost or damaged.
- You want dual SIM capability so you can keep your Eastlink number active while using a travel eSIM for data.
- You want to avoid visiting a store to pick up a physical SIM card.
Once your Eastlink eSIM is active, everything functions the same as before. You can call, text, and use data on Eastlink’s network without any differences. The only change is that the SIM profile is stored digitally inside your phone instead of on a removable card.
How Eastlink Handles eSIM in Canada (What Makes Them Different)
Eastlink handles eSIM activation differently than larger carriers like Freedom, Rogers, or Bell. Here’s the high-level breakdown of how their system works.
- Phones purchased directly from Eastlink
If you buy an eSIM-compatible phone from Eastlink, the eSIM is usually provisioned automatically during activation or upgrade. Most iPhone users never see a QR code because the profile is pushed directly to the device. - Bring Your Own Device (BYOD)
If you are bringing an unlocked, eSIM-compatible phone to Eastlink, you must either visit an Eastlink store or call Eastlink Wireless Support at 1-888-345-1111 to enable eSIM on your account. BYOD customers cannot download an eSIM without Eastlink’s involvement. - Android devices
Eligible Android phones receive an emailed QR code. When scanned, the eSIM profile is downloaded and activated on the Eastlink network. - iPhones
Modern iPhones are usually auto-provisioned. If something goes wrong, Eastlink can generate a QR code manually. - QR codes are single use
Once an Eastlink eSIM QR code has been scanned and installed, it cannot be reused. If you delete the eSIM, reset your phone, or switch devices, Eastlink must issue a new QR code.
Knowing this prevents a lot of confusion. There is no “Download eSIM” button and no way to self-provision an Eastlink eSIM without their involvement. With Eastlink, everything revolves around store activation, support calls, and device-level provisioning.
Eastlink does not offer self-serve eSIM downloads; every eSIM profile must be issued or refreshed directly through Eastlink support, even if the device already shows an eSIM option in its settings. This is different from carriers like TELUS or Rogers, which allow some users to provision an eSIM without contacting support.
For confirmed carrier policies, visit the Eastlink eSIM support page.
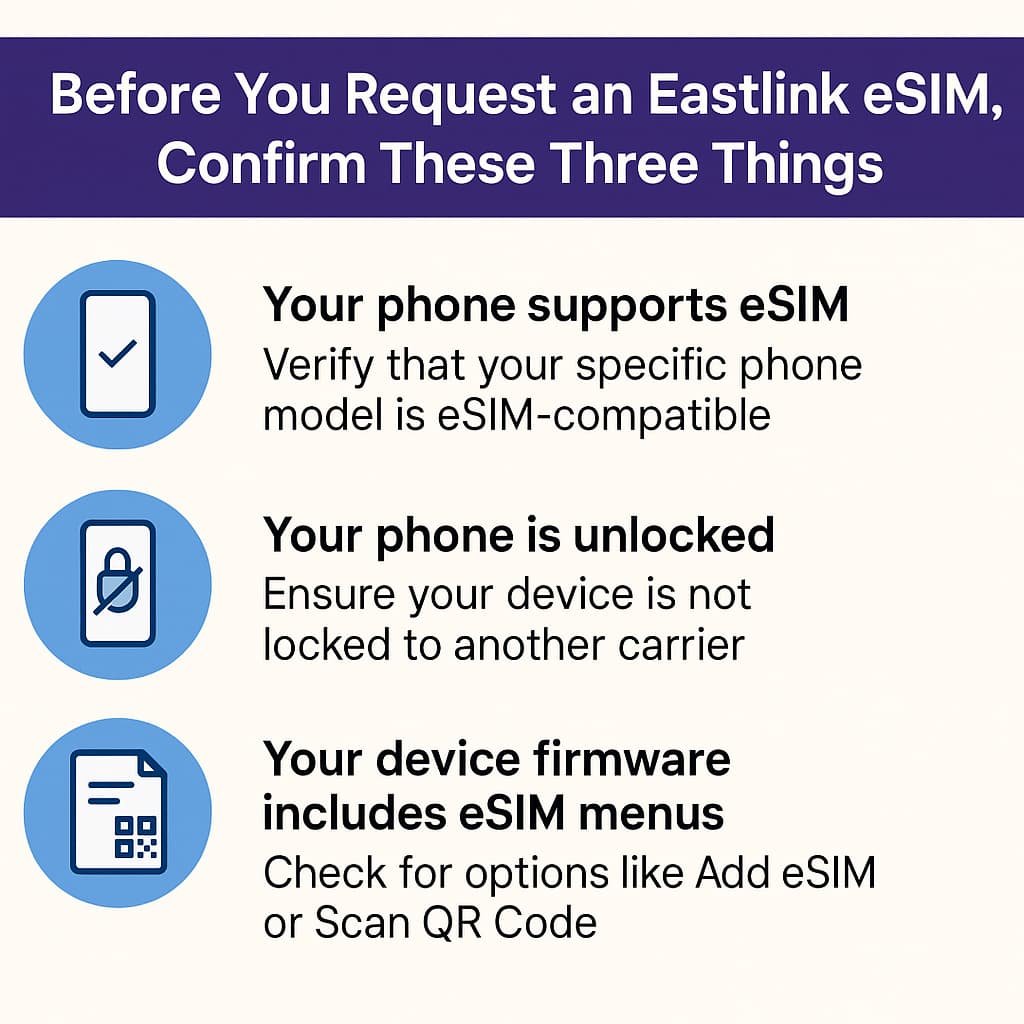
Before You Request an Eastlink eSIM, Confirm These Three Things
If even one of these fails, your Eastlink eSIM activation will not work:
- Your phone supports eSIM
Not every version of a phone model supports eSIM. For example, some Samsung and Motorola variants sold in specific regions lack the necessary firmware. Always verify your exact device model—not just the name. - Your phone is unlocked
If your device is locked to another carrier, Eastlink cannot activate an eSIM on it. In Canada, carriers are required to unlock phones for free, so contact your previous provider if you are unsure. - Your device firmware includes eSIM menus
This is especially important for Samsung and Motorola devices. If you do not see options such as Add eSIM, Scan QR Code, or Download SIM, your firmware may not support eSIM, even if the hardware does.
If your phone passes these three checks, you are safe to request an Eastlink eSIM or QR code and proceed without unexpected issues.
What You Need Before You Activate Eastlink eSIM in Canada
Before tapping through menus, make sure you have:
- An unlocked, eSIM-compatible smartphone
If your device is locked to another carrier, Eastlink eSIM activation will not complete. - An active Eastlink wireless plan or account set for eSIM
New customers complete this during signup. Existing customers may be converting a physical SIM to an eSIM. - A stable Wi-Fi connection
eSIM profiles are downloaded over the internet. Wi-Fi is more reliable than mobile data during activation. - Your Eastlink eSIM details
Depending on your situation, this could be:- an eSIM already provisioned on your new Eastlink iPhone
- a QR code emailed for your Android device
- manual SM-DP+ details (rare; only if provided by support)
- A bit of patience
If you are moving from another phone, network refreshes can take a few minutes on Eastlink’s side.
Once you have everything on this list, you are ready to request your Eastlink eSIM or begin activation.
How to Request Your Eastlink eSIM or QR Code
If you bought your phone directly from Eastlink and it supports eSIM, there is a good chance your Eastlink eSIM is already installed or gets provisioned automatically during activation. If you are bringing your own device or you had an eSIM before and need to reinstall it, you will likely need to request help.
Option 1: Visit an Eastlink Store
If you live near an Eastlink store, this is the most straightforward path, especially for BYOD customers.
- Bring your phone and any ID or account information.
- Ask them to activate your line using an eSIM.
- For iPhones, they can usually complete the setup directly.
- For Android, they can trigger an eSIM profile or email a QR code to you.
If you are nervous about making a mistake, you can ask them to scan the QR code and activate the eSIM right in the store.
Option 2: Call Eastlink Support
If you cannot get to a store, call:
Eastlink Wireless Support: 1-888-345-1111
Explain clearly that you want to activate or move your service to an eSIM. They may:
- Confirm your device model and compatibility.
- Email you a QR code if you have an eligible Android phone.
- Provision an eSIM profile on an eligible iPhone.
- Help you transfer an existing Eastlink eSIM from an old phone to a new one.
Expect them to verify your identity and account details before they make any changes.
How to Activate Eastlink eSIM in Canada on iPhone (Step-by-Step)
These steps apply to most recent iPhones that support eSIM. The exact labels may change slightly between iOS versions, but the flow is the same.
If you bought your iPhone directly from Eastlink and went through their activation process, your eSIM may already be installed. If not, or if you are using a BYOD iPhone with a QR code, follow these steps.
Step 1) Confirm You Have an Eastlink eSIM Ready
If your iPhone came from Eastlink, check if the line is already present:
- Go to Settings > Cellular (or Settings > Mobile Service).
- Look for an Eastlink line already listed.
If an Eastlink line is there and active, your Eastlink eSIM might already be provisioned and you can skip straight to testing.
If you received an emailed QR code or manual eSIM details, keep that email open on a second device or monitor.
Step 2) Open iPhone Settings and Add eSIM
On your iPhone:
- Go to Settings > Cellular > Add eSIM
or Settings > Mobile Service > Add eSIM. - If you see Use QR Code, select it.
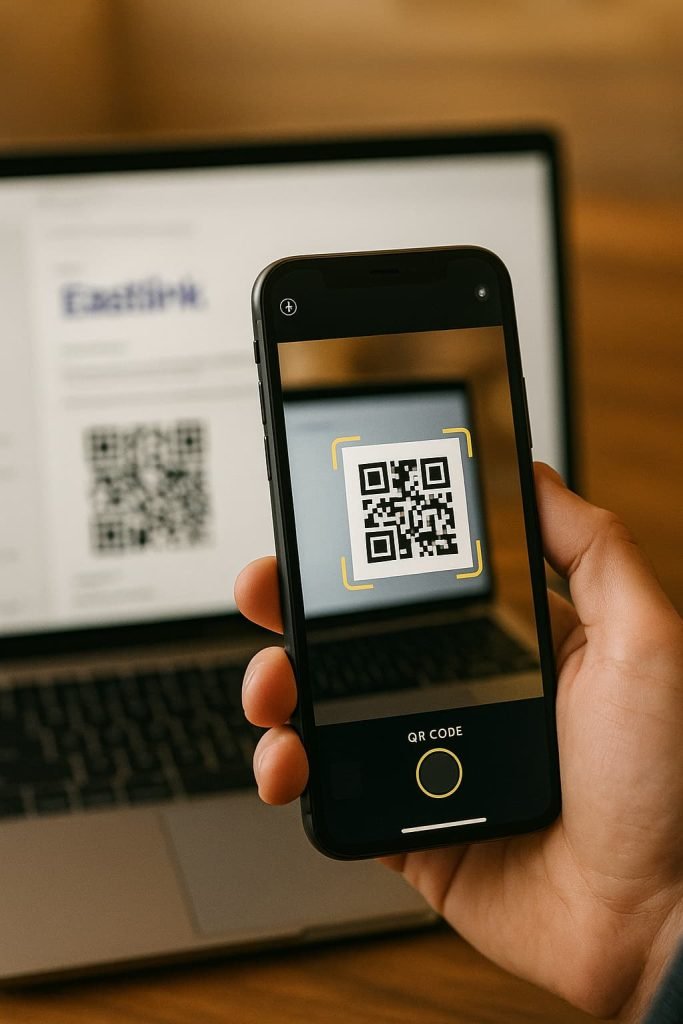
Step 3) Scan the Eastlink eSIM QR Code (If You Have One)
If Eastlink emailed you a QR code:
- Point your iPhone camera at the QR code on the other screen.
- Hold it steady until the phone recognizes the code.
If scanning does not work:
- Tap Enter Details Manually.
- Enter the SM-DP+ address and activation code that Eastlink provided.
Not every Eastlink eSIM setup uses manual SM-DP+ details. If you do not have them, call support rather than guessing.
Step 4) Download and Install the Eastlink eSIM Profile
Once the QR code or manual details are accepted:
- Tap Continue and let the iPhone download the Eastlink eSIM profile.
- Stay on Wi-Fi and keep the screen on during installation.
You should see a message showing that a new cellular plan is being added.
Step 5) Turn On the Eastlink Line and Set Defaults
When the eSIM is installed:
- Tap Turn On This Line.
- If you have another SIM or eSIM already active, iOS will ask:
- Which line should be your default for calls.
- Which line should be your default for data.
- Choose the Eastlink eSIM for data if this is your main Canadian plan.
You can change these later under Settings > Cellular.
Step 6) Test Calls and Data
Once the Eastlink eSIM is active:
- Make a quick test call.
- Open a browser and load a website.
If you see No Service or data does not flow:
- Toggle Airplane Mode on and off.
- Restart the iPhone.
- Confirm Mobile Data is enabled for the Eastlink line.
If it still does not work, you may need Eastlink to refresh the eSIM profile or issue a new QR code.
How to Activate Eastlink eSIM in Canada on Android (Samsung, Google Pixel, and Motorola)
On Android, the path to activate an Eastlink eSIM depends on your phone brand and Android version. For most eligible Android devices, Eastlink emails a eSIM QR code that you scan to push the profile to your phone.
Before You Start on Android
- Open the Eastlink QR code email on another device or print it.
- Make sure your Android phone is on Wi-Fi.
- Ensure the phone is unlocked and supports eSIM.
How to Activate Eastlink eSIM on Samsung Phones (Step-by-Step)
These steps apply to most Samsung Galaxy devices that support eSIM, including S-series, Z Fold, Z Flip, and select A-series models. Samsung menus vary slightly by model and Android version, but the activation process is the same.
If Eastlink emailed you a QR code, keep that email open on another device before you begin.
Step 1) Confirm Your Samsung Supports eSIM
On your phone:
Settings > Connections > SIM Manager
If you see Add eSIM or Add Mobile Plan, your device supports eSIM.
If that option is missing:
Your Samsung may be a U.S. carrier-locked model, a region-specific variant without eSIM, or running outdated firmware. Update the software and try again. If it still does not appear, contact Eastlink before proceeding.
Step 2) Connect to Wi-Fi
The Eastlink eSIM profile downloads over the internet, so use Wi-Fi to avoid interruptions.
Step 3) Add the Eastlink eSIM
Go to:
Settings > Connections > SIM Manager > Add eSIM
Choose Use QR Code if prompted.
Step 4) Scan the QR Code
Point your Samsung camera at the QR code Eastlink emailed to you. Hold still until it is recognized. The phone will begin downloading the eSIM profile.
If scanning fails:
Tap Enter Activation Code Manually (if provided).
Enter the SM-DP+ address and activation code from Eastlink support.
Only use details given to you directly by Eastlink. Do not guess.
Step 5) Enable the Line and Choose Defaults
Once the eSIM profile is installed:
Turn On the Eastlink line when prompted.
Select Eastlink as your default line for calls or data if this is your primary plan.
You can change these settings at any time in SIM Manager.
Step 6) Test Your Connection
Make a test call and open a webpage. If data does not work:
Toggle Airplane Mode on and off
Restart your Samsung
Ensure Mobile Data is on for the Eastlink line
If your phone still shows No Service or Emergency Calls Only, Eastlink may need to refresh your profile or issue a new QR code.
How to Activate Eastlink eSIM in Canada on Google Pixel (Step-by-Step)
Google Pixel has one of the most reliable eSIM setups on Android. Activation is very straightforward as long as your device is unlocked and eSIM-enabled.
If Eastlink emailed you a QR code, keep it open on a second screen.
Step 1) Check for eSIM Support
Go to:
Settings > Network and Internet > SIMs
If you see Add eSIM, your device is compatible.
If Add eSIM is missing:
Your Pixel may be carrier-locked, disabled by firmware, or an older imported unit with limited eSIM support. Update your device or contact Eastlink for confirmation.
Step 2) Connect to Wi-Fi
Stay on Wi-Fi during the install process so the eSIM can download properly.
Step 3) Add eSIM
Settings > Network and Internet > SIMs > Add eSIM
Choose Use QR Code when prompted.
Step 4) Scan the Eastlink QR Code
Aim the Pixel camera at the QR code. The phone will retrieve and install the Eastlink eSIM profile.
If scanning does not work:
Tap Need Help or Enter Details Manually
Enter the SM-DP+ address and activation code provided by Eastlink support
If you do not have these values, call Eastlink before proceeding
Step 5) Enable the Line and Set Defaults
Turn on the Eastlink line
Choose the Eastlink eSIM for calls, texts, and data if it is your primary number
You can adjust these later under Network and Internet
Step 6) Test the Eastlink Connection
Load a webpage and place a call. If activation stalls:
Restart your device
Toggle Airplane Mode on and off
Confirm Mobile Data is assigned to the Eastlink line
If the Pixel still does not connect, Eastlink may need to reissue the QR code or reset the profile on their side.
How to Activate Eastlink eSIM in Canada on Motorola Phones (Step-by-Step)
Motorola only supports eSIM on certain models, mostly Razr foldables and Edge-series phones. If your Moto G device does not show an Add eSIM option, it likely does not support Eastlink eSIM.
If you already confirmed compatibility, follow these steps.
Step 1) Verify Your Motorola Supports eSIM
Settings > Network and Internet > SIMs
or on some models:
Settings > Connections > SIM Manager
Look for Add eSIM or Add Mobile Plan.
If no eSIM option appears:
Your Motorola variant may be region-locked, firmware-restricted, or missing eSIM hardware. Confirm the exact model number with Eastlink support before continuing.
Step 2) Connect to Wi-Fi
The eSIM profile download will fail without a stable internet connection.
Step 3) Add eSIM
Go to:
Settings > Network and Internet > SIMs > Add eSIM
Tap Use QR Code when prompted.
Step 4) Scan the Eastlink QR Code
Scan the QR code that Eastlink emailed to you. If scanning fails:
Use the manual SM-DP+ address and activation code provided by Eastlink
Do not attempt random values. Incorrect entries will prevent activation.
Step 5) Turn On Your Eastlink Line
Once installed:
Enable the Eastlink eSIM line
Assign Eastlink as your default for calls, texts, and data unless you are using dual SIM
Step 6) Test Connectivity
Make a call, send a text, and open a browser. If you see No Service:
Restart the phone
Toggle Airplane Mode
Verify the Eastlink eSIM is the active data line
If the device cannot register on the Eastlink network, request a fresh QR code from support.
How to Activate Eastlink eSIM on Other Android Phones
Menu names vary, but look for:
- Settings > Network & Internet > SIMs > Add eSIM, or
- Settings > Connections > SIM card manager > Add eSIM, or
- Settings > Mobile network > Add eSIM
If you cannot find any Add eSIM option:
- Your phone may not support eSIM.
- Your firmware might be too old and need an update.
- The device might be locked to another carrier.
In that case, check your phone’s official specs and contact Eastlink support before trying again.
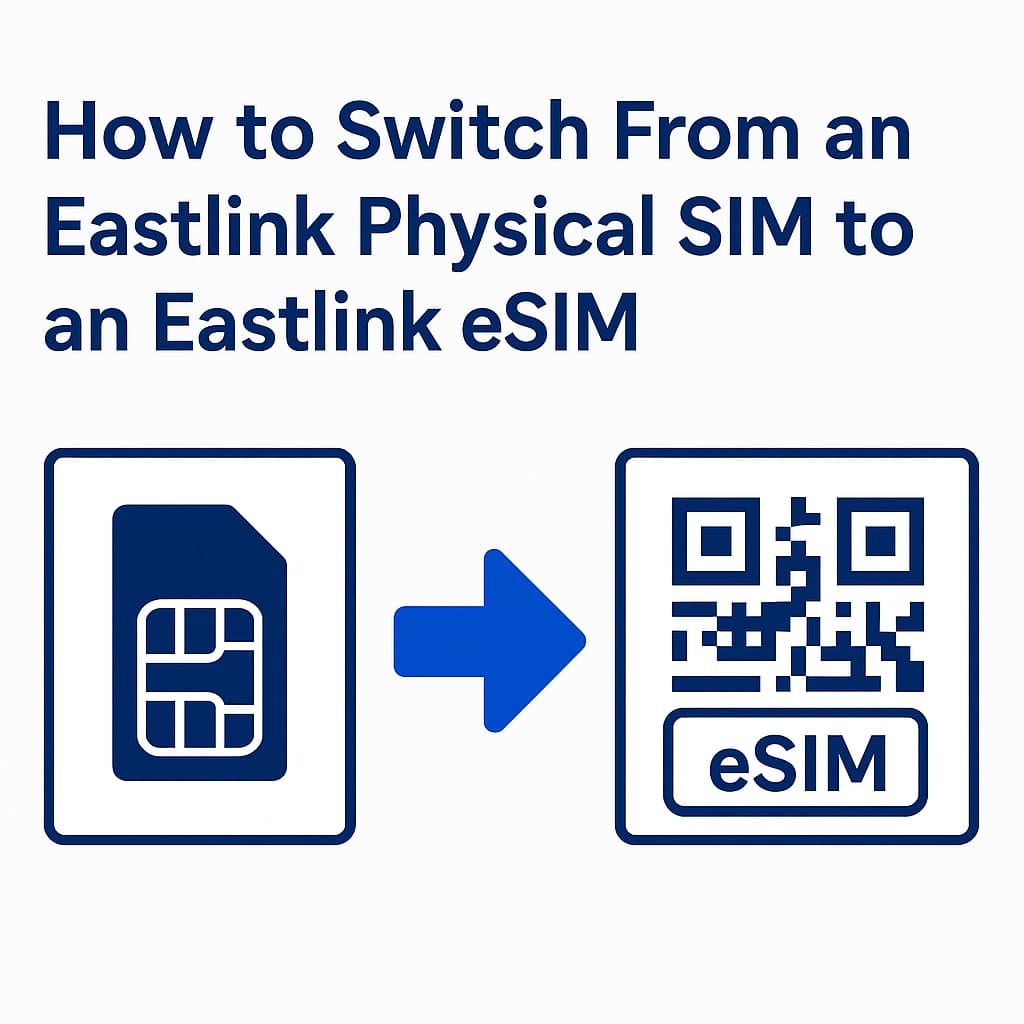
How to Switch From an Eastlink Physical SIM to an Eastlink eSIM
If you already have an Eastlink physical SIM and want to move to an Eastlink eSIM in Canada, you cannot just “convert it” on your phone. Eastlink has to handle the SIM to eSIM swap on their side.
Here is a safe way to handle the switch:
- Back up your phone
Just in case anything goes wrong during the changeover. - Contact Eastlink
Visit a store or call 1-888-345-1111.
Ask for a SIM to eSIM swap on your existing line. - Get the new eSIM profile or QR code
- If you are on Android, they may email you a QR code.
- If you are on iPhone, they may push an eSIM directly to your device.
- Activate using the steps above
Follow the iPhone or Android instructions in this guide to install the new Eastlink eSIM. - Remove the old physical SIM once everything is working
When you are sure calls, texts, and data are working on the Eastlink eSIM, remove the old SIM card so there is no conflict between profiles.
Your Eastlink number and plan move over to the eSIM. The old physical SIM becomes useless once the change is complete.
Eastlink eSIM Compatibility in Canada
Eastlink eSIM will only work on phones that support eSIM technology and are fully unlocked. It does not matter if the phone is brand new or used — if the device firmware blocks eSIM or the IMEI is locked to another carrier, Eastlink cannot activate it.
The good news is that most modern iPhones, Samsung Galaxy devices, Google Pixels, and select Motorola phones work without issues. Here is the breakdown based on real-world Canadian activation data.
iPhone Models Compatible With Eastlink eSIM
Every iPhone from the iPhone XR (2018) onward supports eSIM, and Eastlink provisions most compatible iPhones automatically during activation. If you bought your iPhone directly from Eastlink, chances are the eSIM is already installed before you even touch a QR code.
Fully supported iPhone families include:
- iPhone 17, 17 Air, 17 Pro, 17 Pro Max
- iPhone 16, 16 Plus, 16 Pro, 16 Pro Max, 16e
- iPhone 15, 15 Plus, 15 Pro, 15 Pro Max
- iPhone 14, 14 Plus, 14 Pro, 14 Pro Max
- iPhone 13, 13 mini, 13 Pro, 13 Pro Max
- iPhone 12, 12 mini, 12 Pro, 12 Pro Max
- iPhone 11, 11 Pro, 11 Pro Max
- iPhone XS, XS Max, XR
- iPhone SE (2nd and 3rd Gen)
Important Apple notes:
- U.S. models of iPhone 14 and newer are eSIM-only (no SIM tray)
- Mainland China iPhones do not support eSIM
- Canadian units from Apple or Eastlink are safe to use
If your iPhone came from another country, check the model number before requesting an Eastlink eSIM.
Android Phones That Work With Eastlink eSIM
Unlike Apple, Android eSIM support is not universal. It depends on the model, region, and carrier firmware. The following devices are known to work reliably with Eastlink eSIM in Canada:
Google Pixel (Best Android Experience)
All Pixel models from Pixel 3 onward support eSIM, including:
- Pixel 10, 10 Pro, 10 Pro XL, 10 Pro Fold
- Pixel 9 family, Pixel 8 family
- Pixel 7/7a, Pixel 6/6a, Pixel 5
- Pixel Fold
- Pixel 4 series, Pixel 3/3a series (Fi variants only for early units)
Pixels are generally the least problematic Android phones for Eastlink eSIM.
Samsung Galaxy
Compatible Samsung devices include:
- Galaxy S Series: S20 and newer
- Galaxy Z Fold and Z Flip series
- Select Galaxy A-Series: A54 5G, A55 5G, A56 5G, A25 5G (varies by region)
Samsung warnings:
- Some models sold in U.S., Korea, Hong Kong, and China ship with eSIM disabled
- Galaxy S20 FE is the most common eSIM-incompatible model people mistakenly assume works
Always double-check the model number if you did not buy the Samsung phone in Canada.
Motorola
Eastlink supports eSIM on Motorola phones with embedded eSIM hardware, mostly in the Razr and Edge families:
- Motorola Razr 40/50/60 families, Razr 5G, Razr+
- Motorola Edge 40/50/60/70 series and Edge+ models
- Select Moto G 5G variants (region-specific)
These work if the phone is fully unlocked and the Canadian firmware includes eSIM.
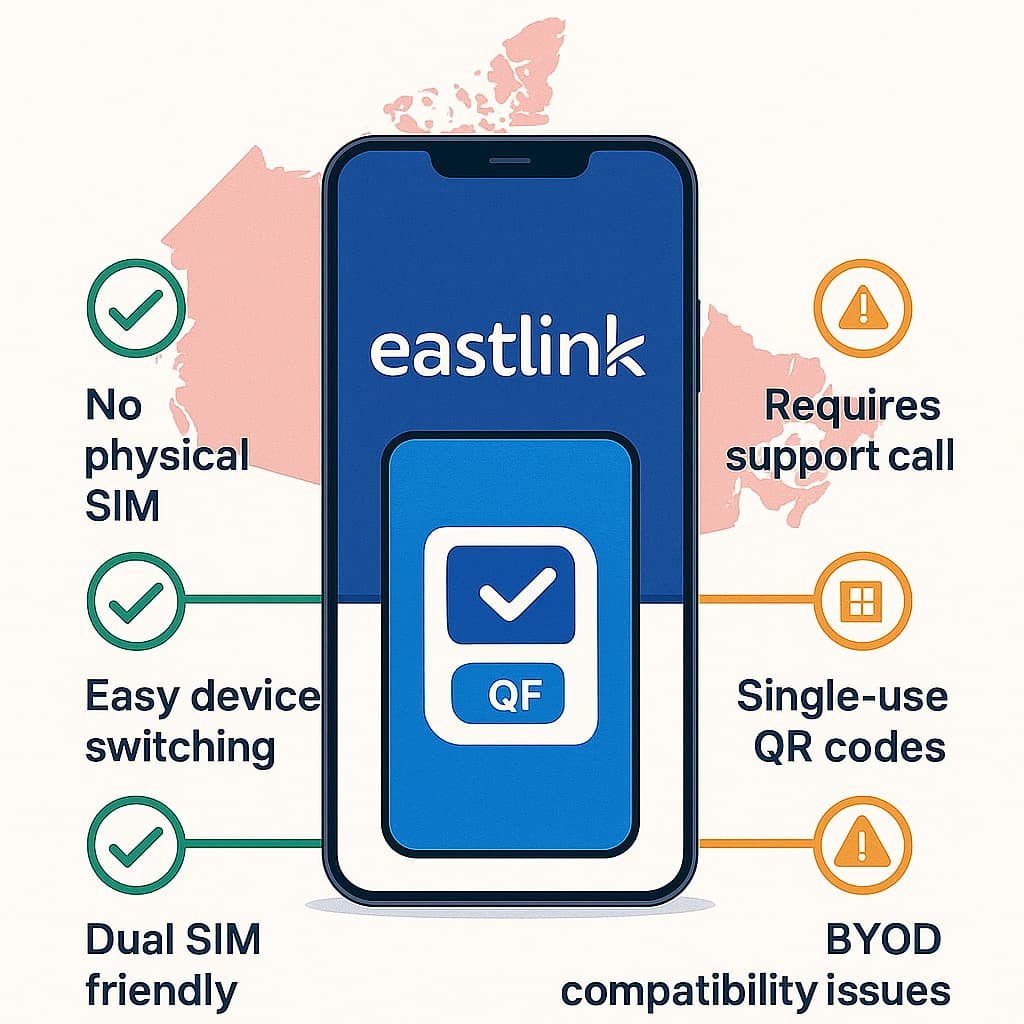
Pros and Cons of Using Eastlink eSIM in Canada
Pros
- No physical SIM card to lose or damage.
- Easy to switch phones once you understand how the QR code process works.
- Works well with dual SIM setups, especially if you use a travel eSIM when you leave Canada.
- Cleaner setup for modern iPhones that do not rely on physical SIM trays.
Cons
- No fully self-serve eSIM portal. You usually have to visit a store or call support.
- QR codes are single use. If you delete the profile, you need Eastlink to issue a new code.
- BYOD users have to be careful with device compatibility and network locks.
- Documentation is not as detailed as some of the larger Canadian carriers, which is why guides like this are necessary.
Advanced Troubleshooting Tips for Eastlink eSIM in Canada
If you followed all the steps and your Eastlink eSIM still does not behave, here are the most common problems and how to approach them.
QR Code Will Not Scan
- Increase the brightness of the screen showing the QR code.
- Clean your phone’s camera lens.
- Hold the phone a bit further away so the entire code fits in the frame.
- If all else fails, ask Eastlink if they can provide manual SM-DP+ and activation details.
eSIM Installs, but You See “No Service”
- Restart your phone.
- Toggle Airplane Mode on and off.
- Check that mobile data is enabled for the Eastlink eSIM line.
- On some Android phones, open Settings > Mobile network and confirm the correct APN is being used for Eastlink.
If you still have no service after 10–15 minutes, the line may not be fully provisioned. Call Eastlink and ask them to confirm that the eSIM profile on your account is active.
“eSIM Already Used” or “Invalid Profile”
Because Eastlink eSIM QR codes are single use, you cannot scan the same QR code on a second device or reinstall it after deleting it.
If you see messages like:
- eSIM already used
- Invalid profile
- Cannot add cellular plan
You will need Eastlink to issue a new eSIM QR code. This is common after factory resets, device changes, or manual deletions.
eSIM Option Is Missing in Settings
If your phone does not show any Add eSIM or Add mobile plan option:
- The device might not support eSIM at all.
- The firmware may need an update.
- The phone might be locked to another carrier.
In this case, check the device manual or official specs, then talk to Eastlink before continuing.
Lost or Stolen Device With an Active eSIM
If you lose a phone that has an Eastlink eSIM active:
- Call 1-888-345-1111 right away.
- Ask Eastlink to temporarily suspend your line to prevent fraudulent use.
Once you have a replacement phone, they can help you set up a new eSIM profile.
Using Another eSIM While Traveling
Eastlink confirms that you can use a different eSIM profile abroad as long as:
- The foreign provider supports eSIM.
- Your phone model supports eSIM in that region.
When you come back to Canada, you can switch your primary data line back to the Eastlink eSIM in your phone’s settings.
Pro Tips for Eastlink eSIM Users in Canada
A few practical tips based on how carriers handle eSIM in real life:
- Always activate your Eastlink eSIM over Wi-Fi, not mobile data.
- If you are doing a SIM to eSIM swap, do it at a time when you can be without service briefly.
- Label your Eastlink line clearly in your phone settings, especially if you run dual SIM.
- Keep the QR code email or printout in a safe place until activation is complete.
- Do not factory reset your phone without confirming how you will reinstall your Eastlink eSIM after.
- If you rely on your phone for work, avoid doing your eSIM activation right before a critical call or meeting.
Frequently Asked Questions About How to Activate Eastlink eSIM in Canada
Can I activate an Eastlink eSIM completely online without calling or visiting a store?
Not in the same way you can with some larger carriers. Eastlink still relies heavily on store visits and support calls to provision eSIMs. If you already have an Eastlink account and an eligible device, you can call support and have them set up or reissue an eSIM profile without physically going in, but you cannot just log in to a portal and click “Download eSIM” on your own.
Does Eastlink support eSIM for BYOD customers?
Yes, as long as your bring-your-own-device is eSIM compatible and unlocked. In that case you will usually visit a store or call support, and for Android they may email you a QR code to activate the Eastlink eSIM on your own phone.
If I delete my Eastlink eSIM from my phone, can I reinstall it using the same QR code?
No. Eastlink QR codes are single use. Once an eSIM profile tied to a QR code is installed or removed, that code is no longer valid. If you delete your eSIM by accident or after a factory reset, you need to contact Eastlink and ask for a new QR code.
How do I know if my phone supports Eastlink eSIM?
Check your device settings first. On iPhone, look under Settings > Cellular > Add eSIM. On Android, check Settings > Network & Internet > SIMs or SIM manager. If you see an option to add an eSIM, that is a good sign. To be sure, you can also check your device manual or provide your exact model number to Eastlink.
Can I move my existing Eastlink number from a physical SIM to an eSIM?
This is a standard SIM to eSIM swap. You contact Eastlink, ask them to move your existing line to an eSIM profile, and then follow the activation steps in this guide on your iPhone or Android device. Once everything is working, you can remove the old physical SIM.
Does Eastlink support dual SIM if I use an eSIM and a physical SIM at the same time?
If your phone supports dual SIM, you can usually run one line on eSIM and another on a physical SIM. For example, you can keep your Eastlink eSIM active and use a separate travel eSIM or a second carrier on the physical SIM. You control which line handles calls, texts, and data in your phone’s settings.
What happens to my Eastlink eSIM if my phone is lost or stolen?
If your device with an active Eastlink eSIM is lost, you should contact Eastlink immediately. They can suspend your line to prevent unauthorized usage. When you get a replacement phone, they will help you set up a new eSIM profile so your number and plan are restored on the new device.
Can I use an international eSIM while keeping my Eastlink eSIM in Canada?
Many people keep their Eastlink eSIM for calls and texts and add a second eSIM for cheaper data when they travel. When you return to Canada, you can switch your default data line back to Eastlink in your phone’s settings.
Does my phone need to be unlocked to use an Eastlink eSIM?
If your phone is locked to another carrier, an Eastlink eSIM will not activate correctly. In Canada, carriers are required to unlock phones on request, so if you are not sure, check your device status and contact your previous provider first.
How long does it take to activate an Eastlink eSIM?
Once you have your eSIM profile or QR code ready and your phone is compatible, most Eastlink eSIM activations complete within a few minutes after installation. In some cases, it can take a bit longer as the network refreshes. If nothing changes after 30 minutes, it is worth restarting your phone and, if needed, calling Eastlink to check the status.
Related Canadian eSIM Guides
If you found this guide helpful, these other posts from our eSIM Canada series will help you go deeper:
- How to Activate eSIM on Android in Canada: Step-by-Step Setup Guide
- How to Activate eSIM on iPhone in Canada (Step-by-Step Guide)
- How to Switch eSIM Between Devices in Canada (iPhone & Android Guide)
- How to Remove or Delete an eSIM in Canada (Step-by-Step Guide)
- How to Fix eSIM Not Working in Canada (iPhone & Android)
- eSIM Canada: Best Providers, Setup & Guide for Travelers & Locals
- Compare Canadian eSIM Providers: The Ultimate Guide to Finding the Right Plan
Use them as follow-ups when something goes wrong or when you move your eSIM between different phones and providers.
Final Thoughts
Activating an Eastlink eSIM in Canada can feel more complicated than it should be. The main reason is that Eastlink does not offer a simple self-serve system like some of the bigger carriers. Once you understand how Eastlink handles QR codes, one-time activation profiles, and line provisioning, the entire process starts to make sense.
Use this guide when you are requesting your Eastlink eSIM, scanning the QR code on your Android device, or moving your existing Eastlink number from a physical SIM to an eSIM on your iPhone. Take your time, stay connected to Wi-Fi, and contact Eastlink support if something does not match what you see on your screen.
After your eSIM is active, the extra effort pays off. You no longer need to worry about losing a tiny piece of plastic, and you get a cleaner and more modern setup that stays with you wherever you go.